As my roommates and I got settled into our new home. I realized that we had lots of dead space. One of the largest notable spaces being our stairwell wall. I thought I may want to blow up some pictures, but I was not sure how much that would cost and with 4 girls living in one home, we had a ton of extra accessories laying around that did not all coordinate. The solution - Anne Sloan Chalk Paint, some old, large, empty picture frames, some framed floral pictures and a few old mirrors we had laying around the house. I decided that the antiqued/slightly aged look was what we were going for as the house has a sort of cottage/shabby chic feel.
Step 1 - The Solution for Mismatched Pieces
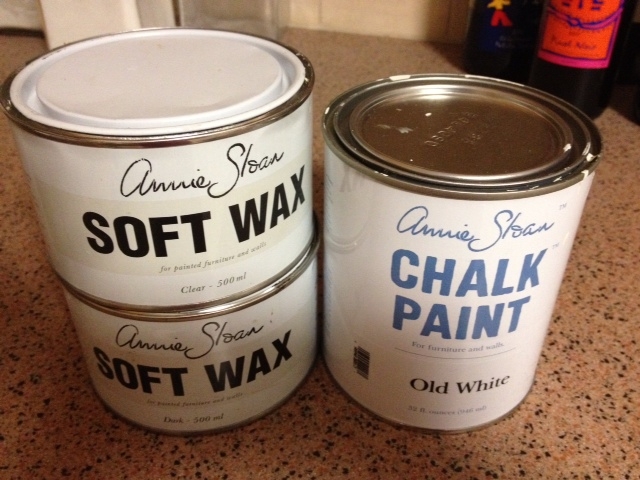
As 4 girls with all types of different tastes and decor moved in, we found that there were lots of extra pieces laying around that did not particularly go together. So we have a stash of picture frames, wall art, mirrors and accessories that were just waiting to be put to use. The solution seemed clear in this case. Use some of those items we already had and make them all go together somehow. I have seen TONS of DIY projects and crafts on Pinterest that use Anne Sloan chalk paint or homemade chalk paint to cover just about any surface without sanding or priming. I thought this sounded like a pretty good solution as some frames were plastic and some were made of wood. Some blogs said that the homemade chalk paint worked as well as the Anne Sloan paint and some said that they could tell a big difference between the homemade and the Anne Sloan. Additionally, many people said that the Anne Sloan waxes were great and really made a difference when it came to giving things the antique look. After reading about the waxes and how awesome they are, I decided to invest in the Anne Sloan chalk paint rather than trying my own since I wanted the antique look.
Finding the paint was a bit of a challenge, but I did end up finding some retailers through the retailer page here. I ended up going with the "Old White" color and bought both the clear wax and the dark wax. All together the paint and waxes ended up costing me a little over $100, but the retailer said a little goes a long way and if stored properly, will not go bad. So I decided the investment was worth it and I was super excited to try this stuff out.
Step 1 - The Solution for Mismatched Pieces
As 4 girls with all types of different tastes and decor moved in, we found that there were lots of extra pieces laying around that did not particularly go together. So we have a stash of picture frames, wall art, mirrors and accessories that were just waiting to be put to use. The solution seemed clear in this case. Use some of those items we already had and make them all go together somehow. I have seen TONS of DIY projects and crafts on Pinterest that use Anne Sloan chalk paint or homemade chalk paint to cover just about any surface without sanding or priming. I thought this sounded like a pretty good solution as some frames were plastic and some were made of wood. Some blogs said that the homemade chalk paint worked as well as the Anne Sloan paint and some said that they could tell a big difference between the homemade and the Anne Sloan. Additionally, many people said that the Anne Sloan waxes were great and really made a difference when it came to giving things the antique look. After reading about the waxes and how awesome they are, I decided to invest in the Anne Sloan chalk paint rather than trying my own since I wanted the antique look.
Finding the paint was a bit of a challenge, but I did end up finding some retailers through the retailer page here. I ended up going with the "Old White" color and bought both the clear wax and the dark wax. All together the paint and waxes ended up costing me a little over $100, but the retailer said a little goes a long way and if stored properly, will not go bad. So I decided the investment was worth it and I was super excited to try this stuff out.
Step 2 - Deciding What to Put in the Frames
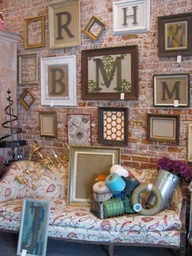
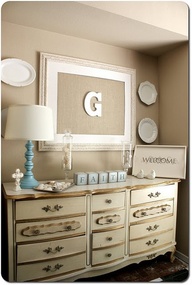
After much debate, I decided to do something super simple and cheap in the middle of the frames. I decided to frame the first letter of each roommate's name as I saw these on Pinterest and thought they were really cute:
After much debate, I decided to do something super simple and cheap in the middle of the frames. I decided to frame the first letter of each roommate's name as I saw these on Pinterest and thought they were really cute:
| 
|
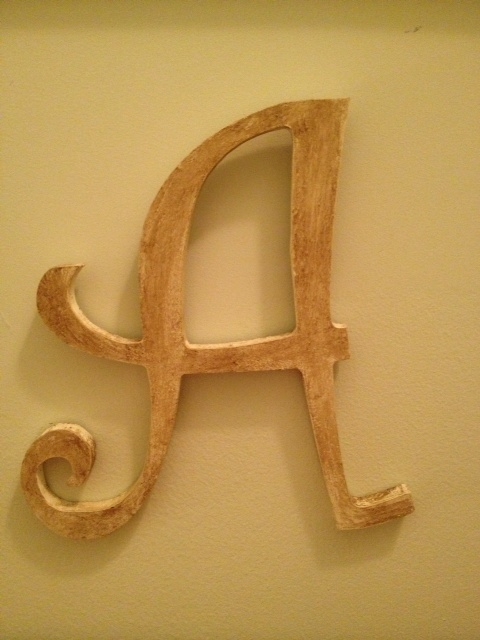
I knew the best place to go for the letters was Hobby Lobby as they normally have some form of wood letters on sale. I ended up buying the letters each in a different font and for about $2.00 a letter totaling $10.00 (one of my roommates has a double name so she gets 2 letters). Some of the letters ended up being made of chip board, some were made of plastic and the others were made of wood. But again, this didn't matter as the Anne Sloan Chalk Paint sticks to just about anything with no sanding necessary.
Step 3 - Painting the Frames and Letters
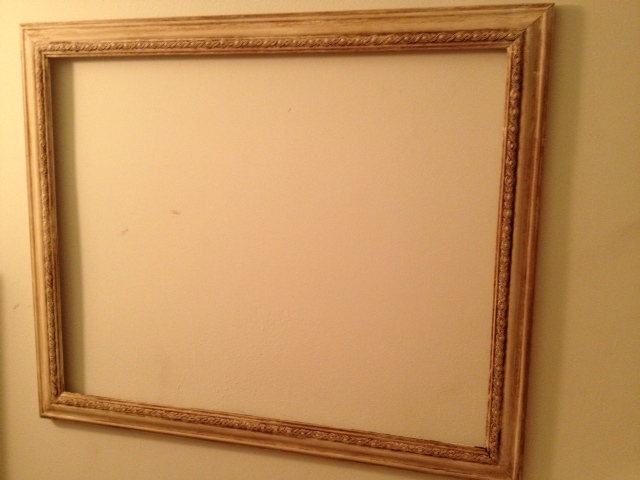
This was my first time working with chalk paint so I did a little research on how to apply the paint. Anne Sloan actually has a short little tutorial on her website (found here) that explains how she applies the chalk paint and the waxes. After my research I tried it myself and here is the final product:
This was my first time working with chalk paint so I did a little research on how to apply the paint. Anne Sloan actually has a short little tutorial on her website (found here) that explains how she applies the chalk paint and the waxes. After my research I tried it myself and here is the final product:
| 
|
Step 4 - Put Everything Together
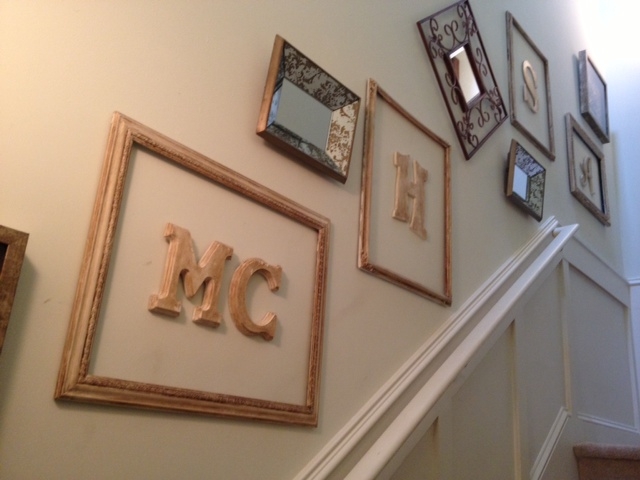
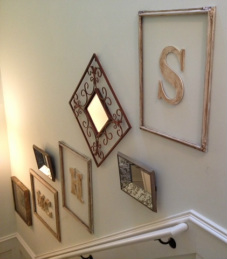
Here is the final product. The frames surrounding the letters were my grandmothers and did not have glass or backing so they were perfect for the wall. They were all a different color and style, but once I painted them, they blended very well. Not to mention I didn't have to buy any frames. All the mirrors and the flower prints were also just laying around the house waiting to be used. The floral pictures and the large mirror in the center were my roommates and were just sitting in a closet so we put them to use. The small mirrors were mine that I bought from HomeGoods last year and did not know where to hang them in our new place but they fit perfectly here. All put together, we have a personalized showcase wall that was low cost and cleared out some storage space.
Here is the final product. The frames surrounding the letters were my grandmothers and did not have glass or backing so they were perfect for the wall. They were all a different color and style, but once I painted them, they blended very well. Not to mention I didn't have to buy any frames. All the mirrors and the flower prints were also just laying around the house waiting to be used. The floral pictures and the large mirror in the center were my roommates and were just sitting in a closet so we put them to use. The small mirrors were mine that I bought from HomeGoods last year and did not know where to hang them in our new place but they fit perfectly here. All put together, we have a personalized showcase wall that was low cost and cleared out some storage space.
| 
|
Sorry for the bad pictures. My stairwell is not open so all I could do is stand at the top and bottom of the stairs. Let me know what you think! Hopefully this provides you with some inspiration and ideas for your home. Happy Crafting!
 RSS Feed